I am going to explain normal Sales order posting in MS Dynamics AX 2012. when compared to earlier version of AX there are much changes in AX 2012 sales order process with respect to UI design and navigation as well.
Process is explained below with screenshots.
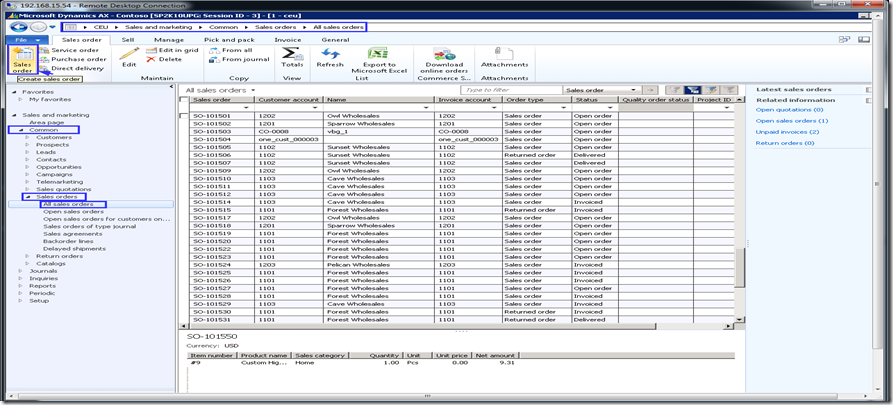
Navigate to module Sales and Marketing OR Accounts Receivable module —> Common –> Sales order—>All Sales order details—> Click Sales order icon in the Action pane, Sales order tab, New group.
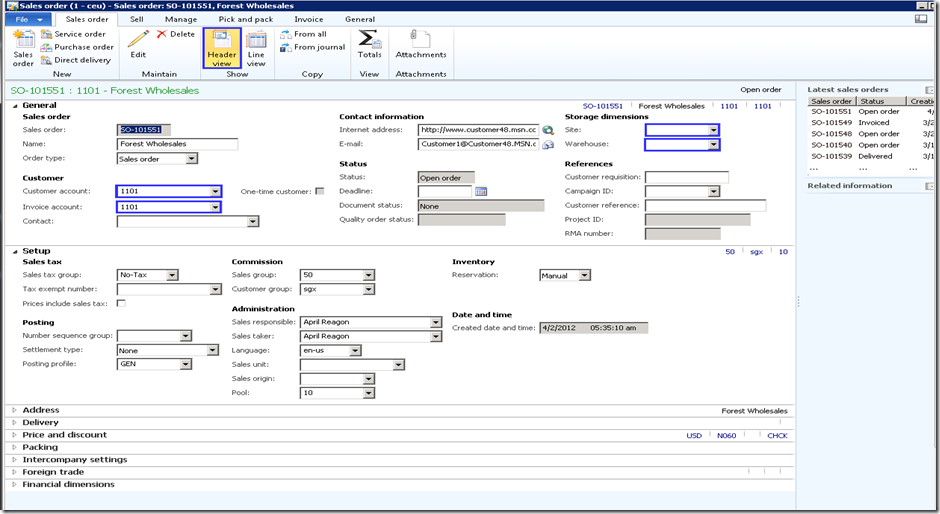
A new Create Sales order form is opened—> Select Customer account and fill relevant information in applicable fields—> Click OK at the bottom of the form.
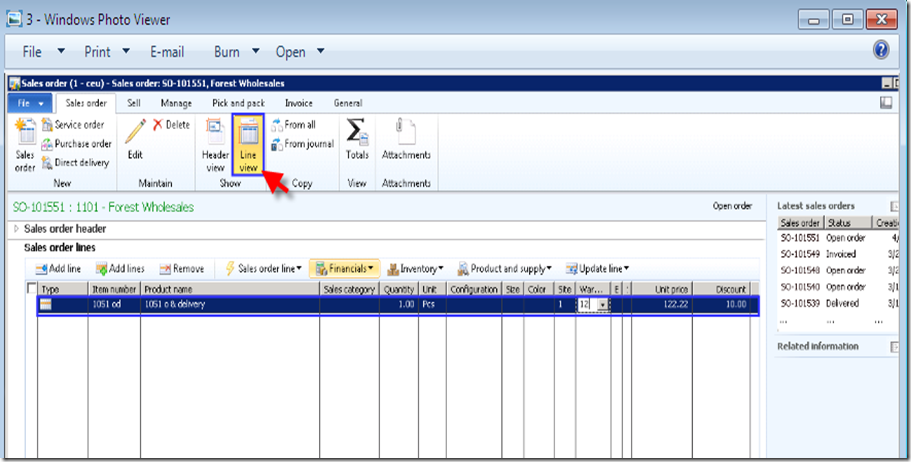
Now Sales order header is created. Sales order form as two icons in action pane called Header viewand Line view in Sales order tab, in Show group as shown in below screenshot. Here we cannot see both Header and Lines, but we can see only one at a time.
Now select Lines view and select Item in Sales order lines section. Enter Quantity and price.
To Confirm the Sales order:
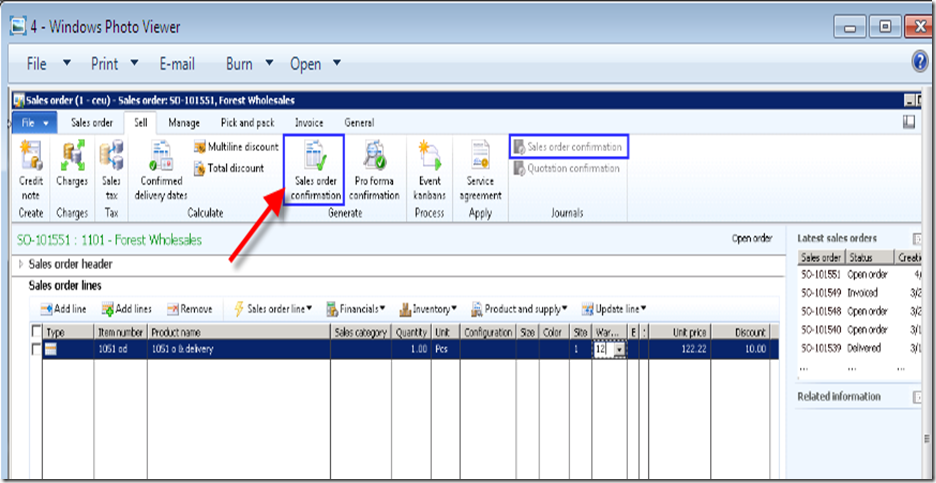
Go to Sell tab in Action pane of Sales order form —> Select Sales order confirmation Icon in Generate group as shown in below screenshot.
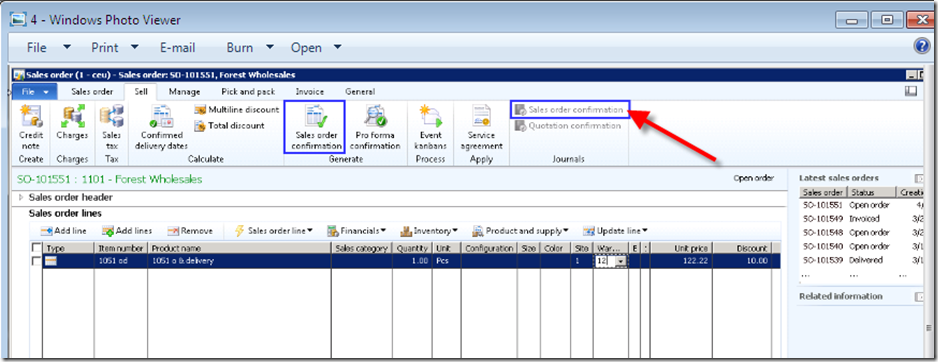
To view print preview of Sales order confirmation –> Click Sales order confirmation option or Icon in Journals group of Sales order action pane as shown in below screenshot. (This is enabled after posting Sales order confirmation only)
To post Picking list
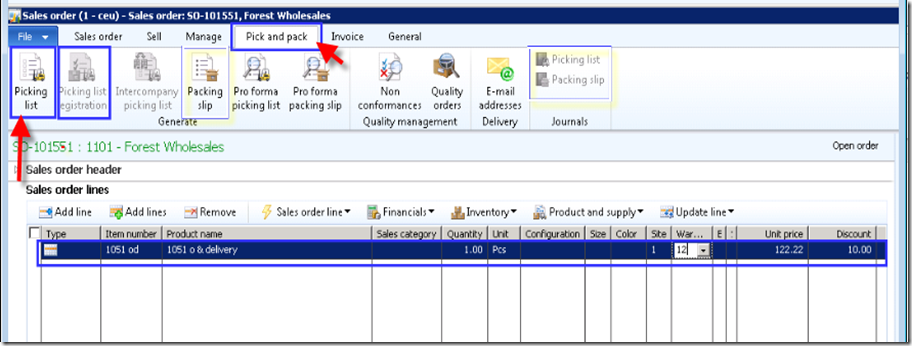
Go to Sales order form—> select Pick and Pack tab in action pane—> Click Picking list icon in Generate group —> Posting Picking list form opens –> Click Ok button—> Sales order Picking list is posted.
To Post Picking list Registration
Go to Sales order form—> select Pick and Pack tab in action pane—> Click Picking list registration icon in Generate group —> Posting Picking list registration list form opens –> Click Ok button—> Sales order Picking list registration is posted.
To view print preview of Picking List and Picking list registration copy.
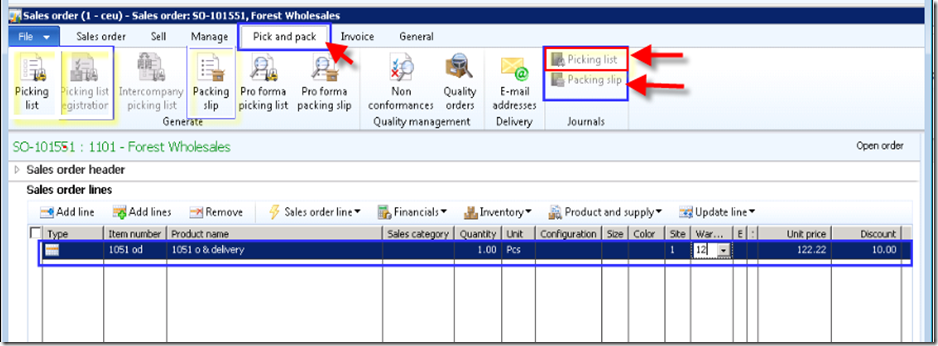
Go to Sales order form—> Pick and Pack tab in action pane –> Select Picking List or Packing slip as required in Journal group—> a new form is opened and click Print and Preview option –> Select any option as required in available option.
Post packing slip.
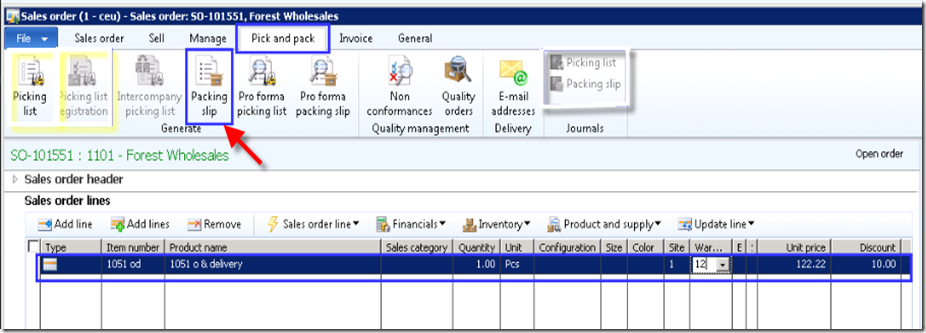
Go to Sales order form—> select Pick and Pack tab in Action pane—> select Packing slip as shown in below screenshot—> Posting Packing slip form opens—> –> Click Ok button.
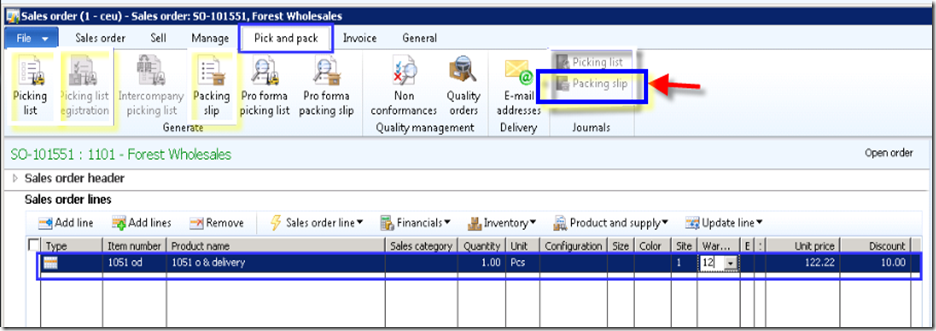
To view print preview of Packing slip copy. Go to Sales order form—> Pick and Pack tab in action pane –> Select Packing slip in Journal group—> Packing slip journal opens –> click Preview/print icon—> select Copy if you want to print copy of an invoice or Original if you wish to print the original Invoice.
Now final step in Sales order Posting Invoice
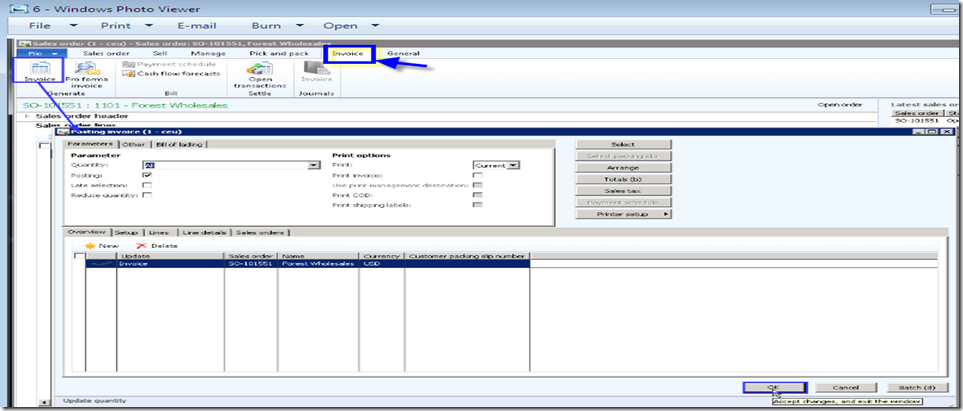
Go to Sales order –> Invoice tab in action pane—> select Invoice icon in Generate group –> Posting Invoice form is opened—> —> click OK in bottom of the form—> Sales order Invoice is posted.
To view print preview of Invoice copy
Go to Sales order form—> click Invoice tab on action pane—>select Invoice option in Journals group—> Invoice journal form is opened –>select overview tab –> select Preview/ Print option—>select from Copy/original invoice as per your requirement—> preview the Invoice copy
Now we have covered all phases of Sales order like Confirmation, Picking list,Packing slip and Invoice posting. This is a normal or simple Sales cycle of an item in AX 2012.


No comments:
Post a Comment